DIY Retro Gaming Console: How to Use the Raspberry Pi to Play Old School Games
If you’re a fan of classic video games, you may be interested in building your own Raspberry Pi retro gaming console. With the right software and hardware, it’s easy to turn a Raspberry Pi into a device that can play games from a variety of old consoles, such as the NES, SNES, and Sega Genesis. In this post, we’ll provide a step-by-step guide to building a Raspberry Pi retro gaming console.
What You’ll Need:
To build a Raspberry Pi retro gaming console, you’ll need the following components:
A Raspberry Pi (any model should work, but the Raspberry Pi 3 or newer is recommended)
A microSD card (at least 8GB)
A microSD card reader
A HDMI cable
A TV or monitor
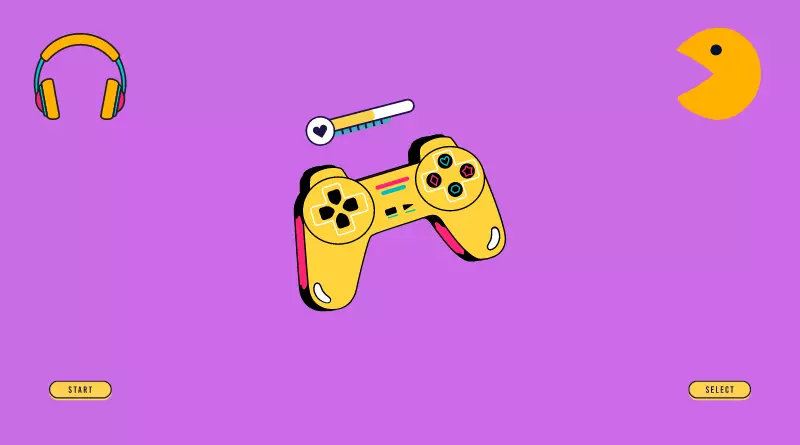
A USB game controller (optional, but recommended)
You may also want to consider the following optional components:
A case for the Raspberry Pi
Additional controllers for multiplayer games
A power supply with sufficient wattage to power the Raspberry Pi and any connected devices
You can purchase these components from a variety of online retailers or electronics stores.
Step 1: Install the RetroPie Operating System
To turn the Raspberry Pi into a retro gaming console, you’ll need to install the RetroPie operating system. RetroPie is a free, open-source operating system that is specifically designed for building retro gaming consoles. It includes a user-friendly interface, support for a wide range of controllers, and easy setup of emulators and ROMs.
To install RetroPie on the Raspberry Pi, you’ll need to download the RetroPie installation file from the RetroPie website. Once you have the file, you can use a program like Etcher to write it to the microSD card. This process is called “burning” the image to the card.
To Burn the RetroPie Image to the MicroSD Card
Insert the microSD card into the card reader, and then insert the card reader into your computer.
Download and install Etcher from the Etcher website.
Open Etcher and select the RetroPie installation file, the microSD card, and the “Flash!” button.
Wait for the process to complete, which may take a few minutes.
Once the RetroPie image is burned to the microSD card, you can remove the card from the card reader and proceed to the next step.
Step 2: Set Up the Hardware
With the RetroPie image burned to the microSD card, it’s time to set up the hardware for your Raspberry Pi retro gaming console. Here’s what you’ll need to do:
Assemble the Raspberry Pi, if necessary. Depending on the model you have, you may need to attach the processor, memory, and other components to the circuit board.
Connect the Raspberry Pi to the TV or monitor using the HDMI cable. If your TV or monitor has multiple HDMI ports, choose the one that you typically use for your cable or satellite box.
Insert the microSD card into the Raspberry Pi. Make sure it is properly seated in the slot and that the connectors are facing the correct direction.
Connect any additional devices, such as controllers, to the Raspberry Pi. You can use USB ports for controllers and other devices, or you may need to use a USB adapter for non-USB controllers.
Plug in the power supply to the Raspberry Pi and turn on the TV or monitor.
You should see the RetroPie splash screen on the TV or monitor. If you don’t, make sure that all of the connections are secure and that the power supply is properly configured.
Step 3: Configure the RetroPie Software
With the hardware set up, it’s time to configure the RetroPie software. When you first boot up the RetroPie console, you’ll be asked to configure a controller. This is necessary for navigating the user interface and playing games.
To configure a controller:
Press the button on the controller that corresponds to the “A” button on an Xbox controller. This is typically the X button on a PlayStation controller or the B button on a SNES controller.
Follow the on-screen prompts to calibrate the controller. This may involve pressing buttons and moving the joystick in different directions.
Once the controller is configured, use it to navigate the RetroPie user interface.
In the RetroPie user interface, you can access various settings and options by pressing the Start button on the controller and selecting the “Configuration/Options” menu. Here are a few things you may want to do:
Configure audio and video settings: You can adjust the display mode, resolution, and other settings to get the best performance and appearance on your TV or monitor.
Set up additional controllers: If you have more controllers that you want to use with the retro gaming console, you can set them up in the “Configuration/Controller Configuration” menu. Simply follow the same steps as you did for the first controller to calibrate and configure additional controllers.
Configure network settings: If you want to be able to download ROMs or access files from a network-attached storage device, you’ll need to set up the network connection in the “Configuration/Networking” menu. Select the type of connection you are using (Ethernet or WiFi) and enter any necessary credentials.
Step 4: Add Games
Now that your Raspberry Pi retro gaming console is set up and configured, it’s time to add some games! There are a few different ways you can do this:
Transfer ROM files directly to the Raspberry Pi: If you already have ROM files for the games you want to play, you can transfer them to the Raspberry Pi using a program like FileZilla. To do this, you’ll need to know the IP address of the Raspberry Pi, which you can find in the RetroPie settings.
Access ROM files from a network-attached storage device: If you have a lot of ROM files or if you want to be able to easily add and remove games, you may want to store them on a network-attached storage (NAS) device. To do this, you’ll need to set up the NAS device and configure the network settings on the Raspberry Pi as described in Step 3.
Keep in mind that it is generally not legal to download ROM files for games that you do not own. There are a few exceptions to this, such as games that are no longer sold or supported by the publisher, but it is important to respect the copyright holders of the games you are playing.
Step 5: Play Games
With your games added to the Raspberry Pi retro gaming console, it’s time to start playing! To launch a game, select it from the list in the RetroPie user interface and press the Start button on the controller.
If you are having trouble getting a game to work, here are a few things you can try:
Check the game’s requirements: Some games may have specific requirements, such as a certain type of controller or a specific emulator. Make sure you are using the right emulator and controller for the game.
Adjust the settings: You may need to adjust the audio and video settings or the controller configuration to get the game to run properly.
Check for updates: The RetroPie software and the emulators may have updates available that fix bugs or improve performance. You can check for updates in the RetroPie settings.
With these steps, you should now have a fully functioning Raspberry Pi retro gaming console. Whether you’re a fan of classic arcade games, old school console games, or both, the Raspberry Pi offers a wide range of options for reliving your favorite gaming memories. If you’re looking for more ideas or want to explore more advanced configurations and features, be sure to check out additional resources online. Happy gaming!

